Substrate Prep & Tools
Achieving a durable glass tile backsplash mandates rigorous substrate preparation, ensuring a level, clean surface free from moisture or contaminants. Utilizing specialized tools and specific adhesives mitigates translucency issues and bond failures, critical for long-term aesthetic and structural integrity in high-moisture environments. Adherence to manufacturer specifications prevents common installation pitfalls.
Substrate flatness is critical, requiring a maximum 1/8-inch deviation over 10 feet to prevent lippage and optical distortion through transparent glass. Inadequate flatness results in adhesive inconsistency, reducing bond strength by up to 30%.
Surface must be clean, dry, and structurally sound. Failure to prime porous surfaces can lead to rapid moisture absorption from thin-set, causing premature drying and weak adhesion, increasing tile delamination risk by 25%.
Utilize a high-quality moisture meter to confirm drywall moisture content remains below 12% before installation, a critical KPI for long-term bond integrity.
Tools Needed:
- Safety Glasses & Gloves: Non-negotiable PPE to prevent chemical burns and lacerations.
- Wet Saw with Glass Blade: Essential for clean cuts; standard abrasive blades cause chipping.
- Notched Trowel: V-notch (1/8" to 1/4") for smaller tiles, U-notch for larger; specific to tile size.
- Level, Measuring Tape, Spacer System: Ensures precise alignment and consistent grout lines.
- Rubber Float, Sponge, Buckets: For efficient grouting and clean-up.
- Mixing Drill with Paddle: For proper thin-set consistency, ensuring uniform torque resistance during mixing until creamy.
Safety Warning: Always wear ANSI-approved eye protection and chemical-resistant gloves. Airborne dust from cutting or mixing requires a P95 respirator.
Adhesive Selection & Layup
Adhesive choice directly impacts visual quality and bond durability for glass tile. Opt for a premium white, polymer-modified thin-set mortar meeting ANSI A118.4 or A118.15 standards, specifically formulated for glass tile to prevent "ghosting" or color distortion visible through the tile.
A critical KPI for adhesive is its "open time," typically 15-20 minutes, which dictates the window for tile placement before skinning. Exceeding open time reduces bond strength by up to 50%, leading to premature tile failure.
Apply thin-set using the correct trowel notch size, ensuring 95% minimum adhesive contact with the tile back. "Back-buttering" each tile with a thin layer of adhesive improves coverage and minimizes voids, mitigating future moisture penetration.
A lesser-known fact: specific glass tile manufacturers often void warranties if non-approved, high-alkaline thin-sets are used, causing chemical reactions that can etch the glass backing over time. Verify product compatibility before application.
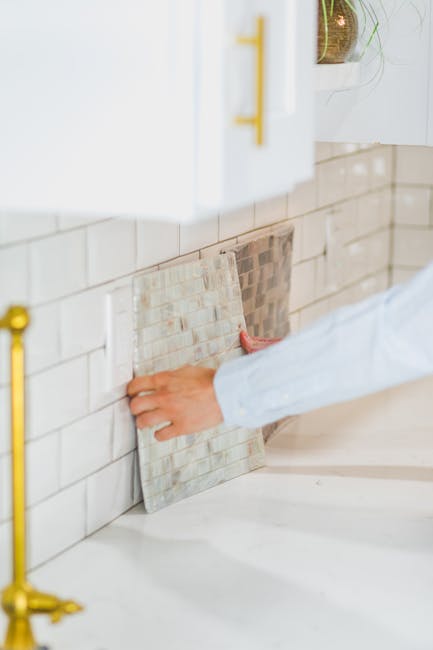
Lay tiles in small sections, pressing firmly with a slight twisting motion to achieve optimal bond, often indicated by a slight audible suction. Consistent spacer use (e.g., 1/16" or 1/8" for glass) is non-negotiable for uniform grout lines, ensuring aesthetic and structural alignment.
Pro-Tip: Perform a periodic "pull-test" on a freshly set tile to visually confirm full adhesive transfer. A minimum 85% coverage is acceptable for dry areas; 95% is mandatory for wet zones, directly impacting durability KPIs.
Precision Cutting & Finishing
Accurate tile cutting is paramount for a professional finish. Use a wet saw equipped with a continuous rim diamond blade specifically designed for glass, operating at a slow, controlled feed rate to prevent chipping or fracturing. Rapid cutting or incorrect blade type increases breakage rates by 40%, impacting project timeline and material costs, directly affecting project ROI.
For intricate cuts or small notches, use glass tile nippers. These specialized tools apply pressure evenly to score and break small pieces cleanly, minimizing shard production.
Ensure all cut edges that will be visible are smooth. Minor imperfections can be gently sanded with a fine-grit diamond pad to achieve a polished edge, critical for visible aesthetic quality.
Emerging in 2026: automated laser cutting services are gaining traction for bespoke glass tile patterns, offering edge precision to 0.05mm, though cost-prohibitive for most DIY installations, limiting accessibility to elite projects.
After all tiles are set, allow the thin-set to cure completely per manufacturer's specifications, typically 24-48 hours, before grouting. Premature grouting can compromise the bond and introduce moisture, reducing adhesive shear strength by up to 15%.
Safety Warning: Always wear eye protection when cutting. Use hearing protection for prolonged wet saw operation. Ensure GFCI protection for all electrical tools near water to mitigate electrocution risks.
Grouting, Sealing, & QC
Grout selection is critical for glass tile; use only non-sanded grout or epoxy grout to prevent scratching the glass surface. Sanded grout will abrade the tile, permanently damaging the finish and aesthetic, leading to a visible KPI failure.
Mix grout to a consistent, pudding-like viscosity. Apply with a rubber float, pushing the grout firmly into all joints to ensure full saturation and void elimination. Voids compromise structural integrity and invite moisture/mold, reducing long-term durability by 30%.
Wipe excess grout immediately with a damp sponge, using diagonal strokes to avoid pulling grout from joints. Multiple passes are required. Haze removal within 24 hours is critical; hardened epoxy haze is extremely difficult to remove without specialized solvents, increasing clean-up time by 200%.
A 2026 market trend indicates a 15% increase in demand for anti-microbial epoxy grouts, offering enhanced resistance to mold and mildew in kitchen and bath environments, extending maintenance cycles by 2-3 years and improving hygiene KPIs.
After grout cures (typically 48-72 hours), apply a high-quality penetrating sealer to cementitious grouts to enhance stain resistance. Epoxy grouts do not require sealing, simplifying long-term maintenance protocols.
What if this fails? Improper sealing or using sanded grout results in permanent surface damage, necessitating complete backsplash removal and reinstallation, incurring 150-200% original material cost and significant labor hours.
Pro-Tip: Perform a final Quality Control (QC) check under varying light conditions (natural and artificial) to identify any missed haze, grout imperfections, or optical anomalies. This proactive step prevents post-completion dissatisfaction and potential warranty claims.